
.:: Home || Web Graphics || Slat Bed ::.

Building a Viking style slat bed in two weeks, or "Have you lost your mind??"
Just before Pennsic 32, after various attempts over the years to come up with sleeping solutions that would get Shannon and I up off the ground at camping events, I decided to stop screwing around with my own schemes for building a sturdy bed that would be easy to transport and take a look at tried and true designs.
I discussed my dilemma with my woodworking buddy and good friend Haraldr Bassi, and he suggested a slat bed based on a bed discovered in the Gokstad ship that a few people from his shire had built. After many a conversation with him via AIM in which he managed to teach me about mortise and tennon joinery and helped me determine the size of the tennons, I was set. I went out and purchased a mortising machine, because there was no way that I would be able to hand cut 34 mortises in my spare time after work in time for Pennsic.
With Haraldr's help, I decided to go with Poplar for the bed for a number of reasons:
So now that I had picked out the wood I wanted, I had to find a relatively local source for it. We were living in Delaware at the time, and I found a place near me named Durkee Fine Wood Working. They would mill poplar to the exact sizes that I wanted and were very easy to work with. Since then, we've moved to Norristown, and I'll be going to Hearne Hardwoods the next time I need hardwoods. I ordered my wood, waited a few days before I could pick it up, and then dove in to the project. Two weeks later, we loaded it up into the van and headed out to Pennsic!
Bed Details
The basic construction isn't all that hard. Charles Oakley has some instructions that are very similar (but not exactly like) to this bed. I didn't really have a plan. With Haraldr's help, I figured out the size I wanted and the basic layout for the corner posts. One of these days, I'll get around to drawing up some instructions/plans for the bed. Once of the changes was to add a 2nd end board as a head board, for no other reason than I wasn't trying to reproduce the bed, but make something for Shannon and I to sleep on, and we wanted one :) I also used round pegs instead of wedges like Charles' instructions show and added a support piece that runs from the head board to the foot board, because I didn't like how much the slats were flexing with both Shannon and I on it.
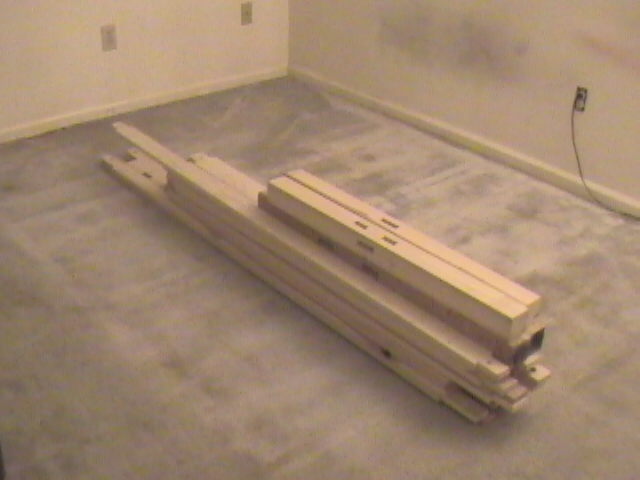
When I was done, I was pleasantly surprised to find out just how compact the bed was. As you can see in the picture below, it's not a very big pile of wood. It's only about 6.5 feet long, a food wide and 1.5 to 2 feet tall. That's it!
Since these pictures were taken, I have done some additional work on the corner posts, adding in the decorative detail you can see in Charles' drawings.
Show me more!
For your viewing enjoyment, here are some more pictures of the bed....
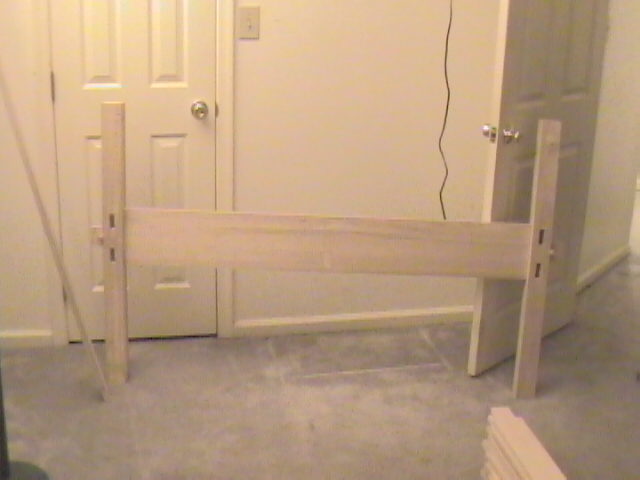
The assembled foot board
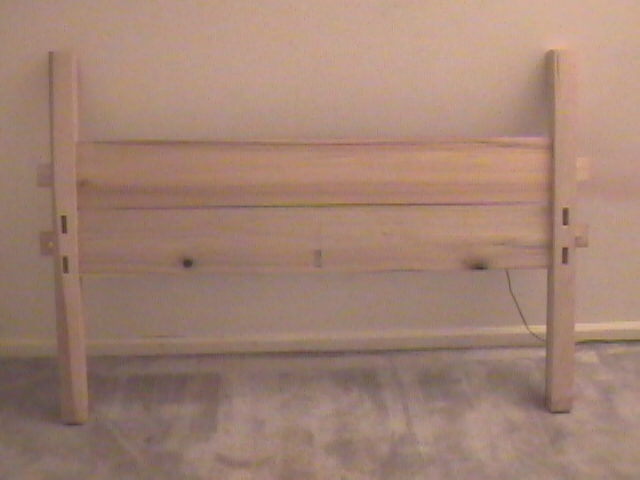
The assembled head board
Starting to assemble the side rails and slats

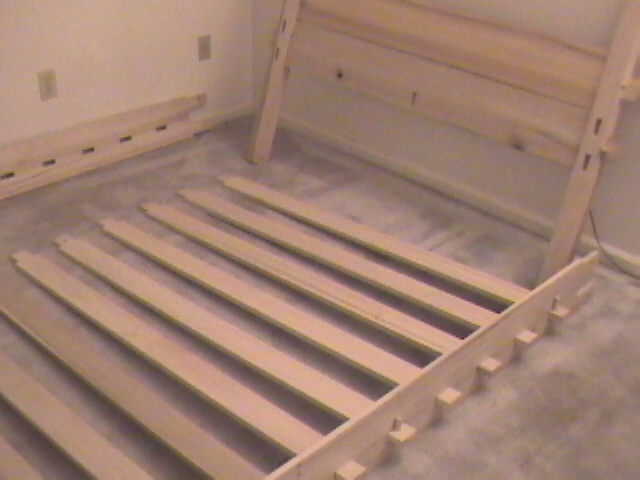
The assembled side rails and slats just before putting on the head and foot boards
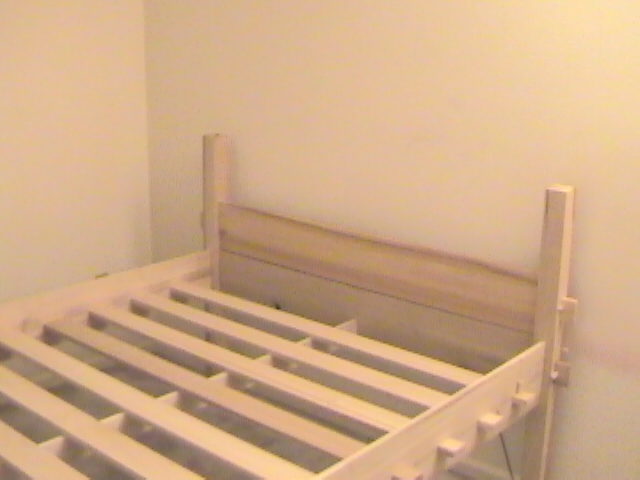
The bed has been fully assembled. This is looking towards the head board
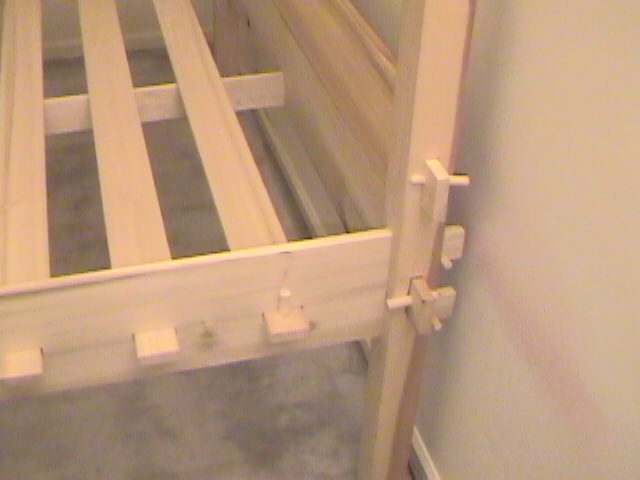
Here you can see the detail of how the side rails and head board go together
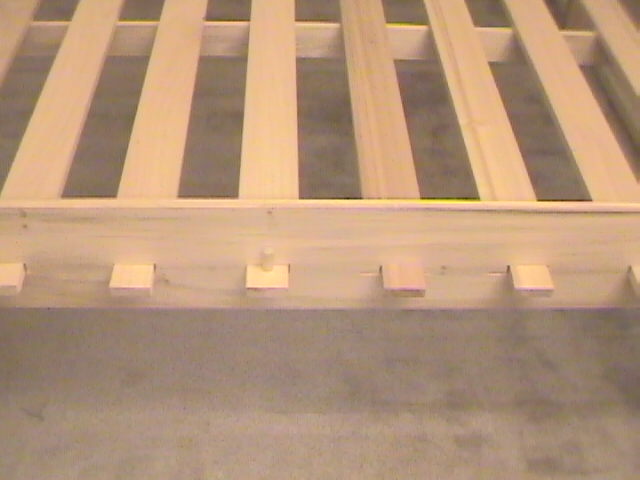
Here you can see the detail of how the slats are pegged together with the side rail. Only 3 of the 9 slats are pegged
That's cool! How can I get one of those for myself?
It's pretty easy. There are two ways you can get one of these for yourself. Make arrangements and come by my shop, and I'll help you make one. Or, if you're not comfortable around tools, you can commision me to make one for you. In either case, email me and we'll talk about it!
What's in store in the future?
What you see here is what I've come to refer to as my Mark I bed. I don't have any pictures of the Mark II, but it's fairly close in design to the Mark I. I lowered the second headboard and cut the tennons shorter on the 6 slats that are not pegged. The corner posts are smaller, as I had to make them by laminating 1" x 3" boards. I've finished the plans for the Mark III and just about finished making the templates. I've found a source of 10/4 poplar for the corner posts, but I will be keeping the size the same. I'm also moving up to 1" x 6" slats (the real finished size of a 1" x 6" is 3/4" x 5 1/2 ") for a firmer bed that may not need the extra support running from the head to the foot. As soon as I can, I'll put pictures of the Mark III up, along with the plans.